Open topic with navigation
Create A Grid From All Sources
From the bar, select to open the Create Grid From All Sources dialog box. Use this dialog box to select
one or more horizons to grid. All output grids will use the same gridding
method and parameters.  View image
- Data is only available for gridding if it is associated with a horizon.
To grid well information, such as depth and velocity, you must first associate
the well top with a horizon. Read
more.
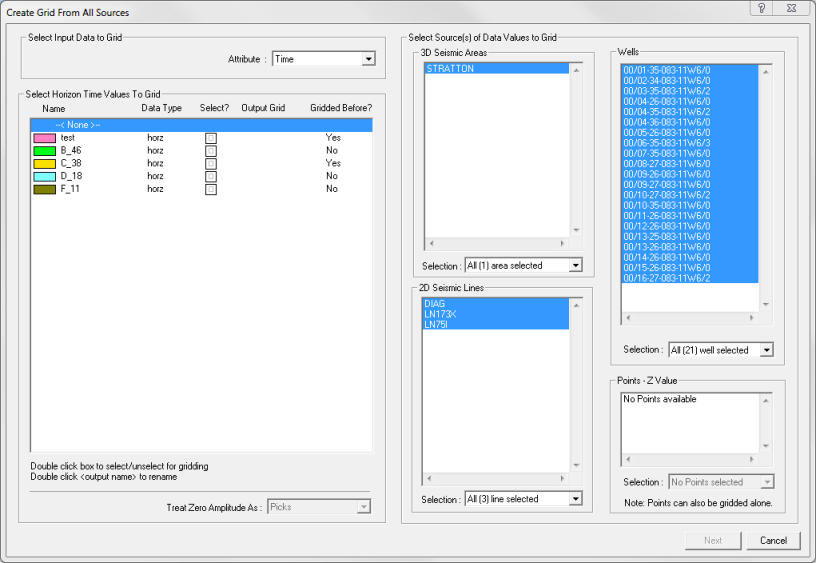
This dialog box has the following options:
- - This section enables you to select what attribute you want to grid with. You can select from , , , , and .
- - This section lists information about each horizon or fault, including the name, the type, if the horizon or fault is set to grid, the name of the horizon or fault as it will appear on your grid, and if the horizon or fault has been gridded before. If you want to grid a horizon or fault, double-click to select its check box under the Select column. If you want to change how a horizon or fault appears on your grid, double-click its name in the Name column, and type in a new name. If a horizon or fault was gridded before, then in the Gridded Before column it will say Yes. Double-click the word Yes to view the that horizon or fault's gridding history. If you selected from the Attribute list as your input data, you can also choose how you want to treat zero amplitudes from the Treat Zero Amplitudes As list.
- The title of this section will change depending on which data type you select from the Attribute list.
- - Select data points for gridding. To include or exclude individual 2D seismic lines, 3D seismic areas, wells, or points, each section has its own Selection list . From these lists, ProductName provides you with the option to select all, some, or none of the items listed in the corresponding section.
What do you want to do?