 View image

 How to open the seismic interpretation tab
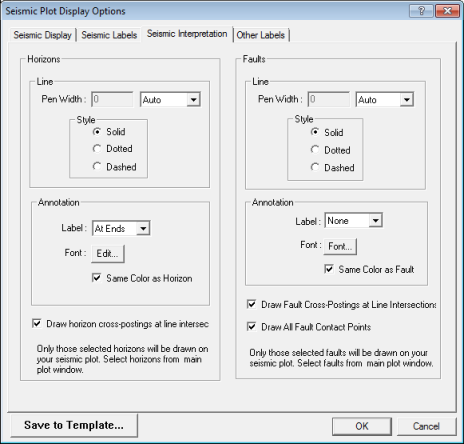
Use the Seismic Interpretation tab to control the appearance and annotation of horizons, faults, and cross-postings at line intersections.
This tab has the following options:
Customize the appearance and annotation of horizons and horizon intersections.
Horizons Line Pen Width – Select a line width in inches, millimeters (mm), microseconds (us), milliseconds (ms), or pixels. Select ‘Auto’ to have WinPICS pick a reasonable width based on the plot scale.
Horizons Line Style – Select solid, dotted, or dashed for the horizon line style.
Horizons Annotation – Select to annotate horizons at the ends of the line (in the margins of the display), in the center of the plot, or not at all. Click <Font> to change the default font, font style, or font size. Select the Horizon Color check box to label the horizons in the same color as the horizon.
Draw Horizon Cross-Postings – Select this check box to enable horizon cross-postings at line intersections.
Customize the appearance and annotation of fault and fault intersections.
Faults Line Pen Width – Select a line width in inches, millimeters (mm), microseconds (us), milliseconds (ms), or pixels. Select Auto to have WinPICS
Faults Line Style – Select solid, dotted, or dashed for the fault line style.
Faults Annotation – Select to annotate faults at the ends of the line (in the margins of the display), in the center of the plot, or not at all. Click <Font> to change the default font, font style, or font size. Select the In Fault Color check box to label the faults in the same color as the fault.
Draw Fault Cross-Postings – Place a check mark to enable fault cross-postings at line intersections.
Draw All Fault Contact Points – Place a check mark to draw all fault contact points on the plot.