Open topic with navigation
How to Create and Open a Print Template
The following sections explain how to create and apply a template, as
well as how to create and open a print project file. Read
more about the difference between a template and a print project.
Create a template
If you adjust the current template in a way that you think you will
use again in the future, you can save time by saving the current layout
to a new template file.
In the future, when you want to use this layout, you can select the
template and then print your results.
- From GeoVista's Main Menu, select
File | Print Preview to open the
GeoVista
Print Layout Tool.
- Modify the current template
(page size, author's block, legend, scale, etc).
- From the GeoVista
Print Layout Tool's main menu, select File
| Save to open the Save
As dialog box, where you can save your changes as a new print template
file () or a new print project file ().
- Select File
| Exit to close the GeoVista
Print Layout Tool and return to GeoVista's main interface.
Open a print template
- From GeoVista's Main Menu bar, select
File | Print Setup to open the
Print
Setup dialog box.
- In the Print
Options tab's Select Layout
section, select Template.
- Select your template from
the list. If your template is not in the list, click the <Folder>
button to search for your template.
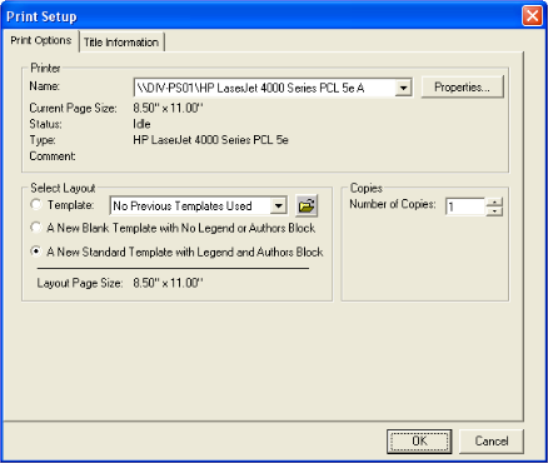
- Click <OK>
to set the selected template as GeoVista's default template.
- What you set in the Print
Setup dialog box becomes GeoVista's default setting for all future print jobs. If you close and then reopen
the GeoVista's software, your selected
template will still appear as the default.
Open a print project file
Follow these steps to open a print project file:
- From GeoVista's Main Menu, select
File | Print Preview to open the
GeoVista
Print Layout Tool.
- From the GeoVista
Print Layout Tool's main menu, select File
| Open to launch the Open
dialog box, where you can locate the print project file ().
- Select the file and click
<Open> to return to the
GeoVista Print Layout
Tool.
What do you want to do?