Open topic with navigation
How Print Multiple Maps as a Single Package
While working in ProductName, you may have several maps that you want to print as a package. To ensure you create a uniform package, you will need to determine a standard page size to use for printing each map you want in that package. You can use the auto-size feature of the Print Map dialog box to quickly determine the standard paper size you will need for your printed package. Follow these steps:
- Open the Map window that you have your largest map that you want to print loaded into. The paper size needed for the largest map will be the standard paper six you will use for each map you want to add to the printed package.
- From that Map window's Other Map Tools toolbar, click
 to open the Print Map
dialog box.
to open the Print Map
dialog box.  View image
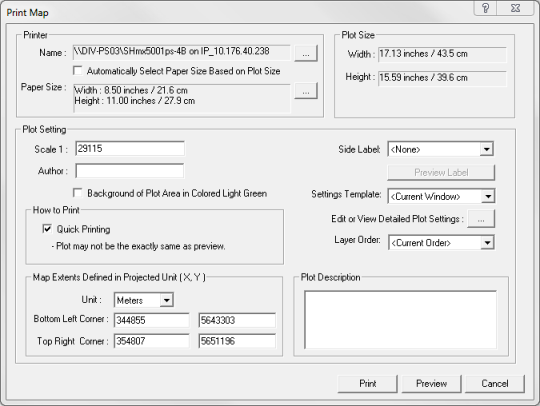
- In the Printer section, select the Automatically Select Paper Size Based on Plot Size check box. This action immediately checks your printer to see if it supports paper auto-sizing. If your printer doesn't support auto-size then you will see an error message.
- Click <OK> to close the message. In the Paper Size field, ProductName displays the minimum size of paper you will need for your print jobs. Use the height and width in this field to determine the paper size. For example:

- Clear the Automatically Select Paper Size Based on Plot Size check box.
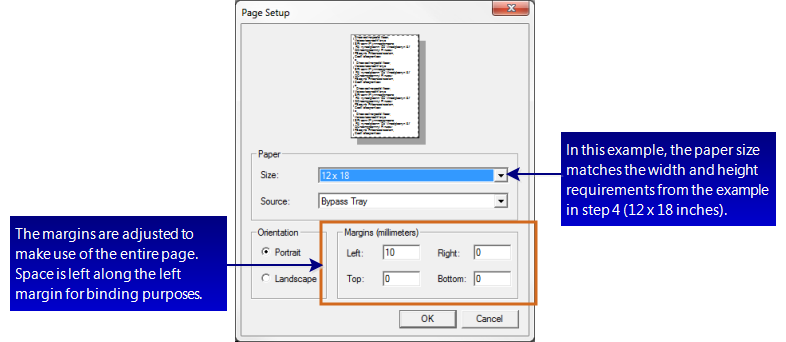
- Next to the Paper Size field, click <...> to open the Page Setup dialog box. View image
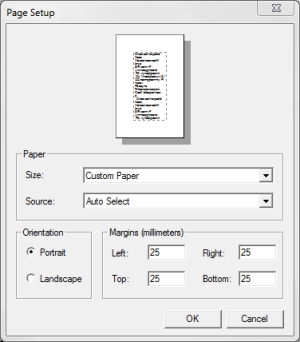
- In the Paper section, select the Size of paper you need and the Source (or tray) your printer will use. You can also adjust the paper Orientation and Margins as you need, For example:
- Click <OK> to use these settings and return to the Print Map dialog box.
- Set the rest of the settings you want for your printed map and click <Print>.
- For each map you want to include in your printed package, you will need to open the Print Map dialog box from the corresponding Map windows, and repeat steps 6 to 9.
What do you want to do?