Open topic with navigation
You are here: Working in the Map window > Gridding > Manage Grids Dialog Box
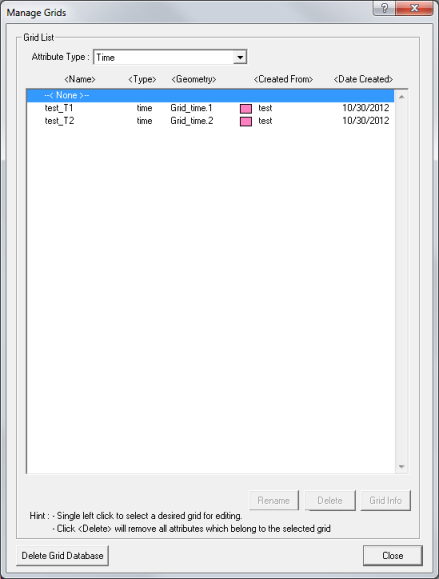
Manage Grids Dialog Box
 View image
How to open this dialog box
On the menu bar select to open the Manage Grids dialog box.
About this dialog box
The Manage Grid dialog box lists all the available grids in your database. For each grid, this dialog box tells you the grid name, type, geometry, the horizon it was created from, and the date the grid was created. You can use this dialog box to view grid information and manage your project's grids.
- If a grid's Created From column will be empty, it is because the horizon that grid was created from has been deleted from the project.
Options for managing grids
You have the following options for managing grids:
- - Highlight a grid in the list and click <Rename>.
Enter a new name, making sure to follow the rules for naming grids.
- - Highlight a gridded
horizon and click <Delete>.
- - Highlight a grid in the list and click <Grid Info> to display the selected grids' information.
- - Click to remove all grids from the database.
- This includes grids of all data types, not just the grids that you can
see in the current listing. Time, Amplitude, Velocity and Depth Grids will all be deleted.
- You can't delete a grid when it is posted on the map. Right-click on the map and select
from the shortcut menu (or press <e> on your keyboard) to clear
the current posting. You will now be able to delete the grid.