Open topic with navigation
How to Select a Print Area you Draw
Follow these steps to use your cursor to draw a box to select an area
to print:
- Select File
| Select Print Area to open the Select Print Area dialog
box.
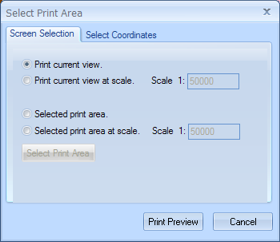
- Click the Screen
Selection tab.
- Select the Selected
print area option.
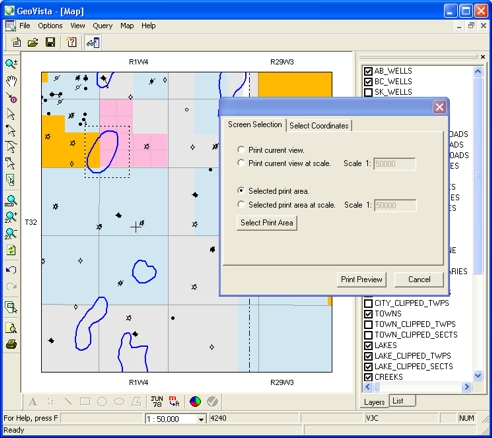
- Click <Select
Print Area> to go to the current Map
View. Your cursor will appear as a cross.
- Left click on one corner
of the area you want to select, and drag the cursor to place a box around
your entire print area.
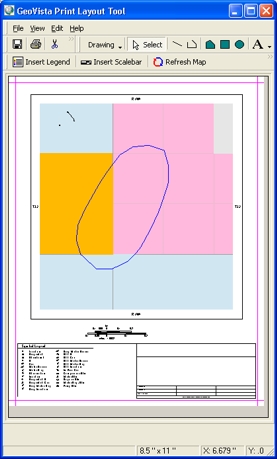
- Return to the Select
Print Area dialog box, and click <Print
Preview> to open the GeoVista Print Layout Tool dialog
box, where you can see a preview of your area, edit how your page will
print, and print your area.
- If
the size of your selected print area is smaller or shorter than the selected
paper size, GeoVista will add
extra area to fill the map area of the page.