View image
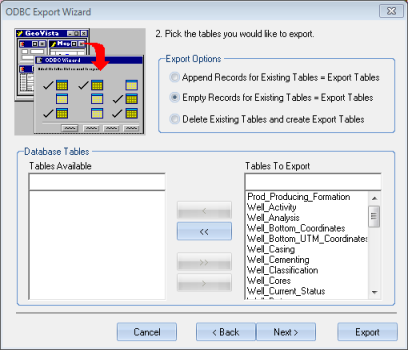
Use step two of the ODBC Export Wizard to choose which table you want to export.
Export Option Description Append Records to Existing Tables
Sets GeoVista to add information from this export to information that already exists in the target file. This option is useful if you are trying to build a file that contains information obtained through several separate searches in GeoVista.
Empty Existing Tables
Sets GeoVista to delete the contents of tables in the target file prior to exporting the new information (default). GeoVista will only delete the contents of tables that it has previously created and that it is reloading with this export, so this option will not affect the contents of any user-defined tables in the target file.
Delete Existing Tables
Sets GeoVista to remove all of the existing tables (or worksheets) from the target file prior to exporting the new information. Use this option to delete all previous work from the target file.
What do you want to do?