Open topic with navigation
Time Depth Wizard- Overview
 View image

 How to open time depth wizard
On the Application toolbar, select  .
.
About the time depth wizard
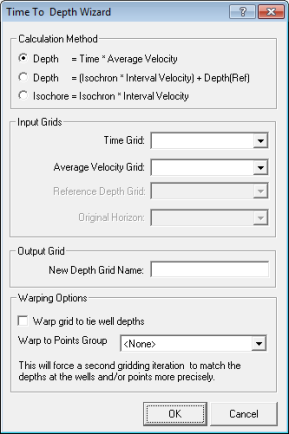
Use the Time Depth wizard to generate a depth grid from grids
with various geometries, so you can post the information to your map.
There are two methods of generating a depth grid, and one method of generating an isochore thickness grid.
Calculate depth using average velocity.
- Select the appropriate Time
and Average Velocity grids. This
method uses the horizon gridded in the Time
Grid field of the depth equation as the reference horizon.
- Type a unique Output
Grid Name to identify the newly created depth grid.
- Click <OK>.
WinPICS stores the new grid in the Depth field of the gridded database.
Calculate depth using Interval Velocity
- Select the appropriate Isochron,
Interval Velocity and Reference
Depth grids.
- In the Original
Horizon list, select the horizon you want to force the new depth grid to associate with.
- Type a unique Output
Grid Name to identify the newly created depth grid.
- Select the Warp Grid to Tie
Well Depths check box if you want to force a second gridding
iteration to
match the depths at the wells more precisely.
- Select a Points Group from the list if you want to force a second gridding iteration to match the depths of the selected points group more precisely.
- Click <OK>. WinPICS stores the new grid in the Depth
field of the gridded database.
Calculate thickness using interval velocity
- Select the appropriate Isochron and
Interval Velocity grids.
- In the Original
Horizon list, select the horizon you want to force the new depth grid to associate with. By default, WinPICS selects the horizon you used to calculate your isochron grid.
- Type a unique Output
Grid Name to identify the newly created depth grid.
- Click <OK>.
WinPICS stores the new grid in the User Defined
field of the gridded database.
What do you want to do?
 View image