Open topic with navigation
Calculate
Contact Points
 View image

 How to open the calculate contact points dialog box
Open the Calculate Contact Points
dialog box in one of two ways:
- From the Mapwindow
- Select |
(or press <Ctrl> + <c> on your keyboard).
- From
the Seismic window - Select
WinPICS
will calculate contact points for horizon intersections with faults. This places
a wedge marker on your seismic section or map based on an interpolation
of the horizon picks nearest the fault. This does not necessarily place
picks on the traces adjacent to the fault. You will need to manually pick
the data if you want to have picks on these traces. Contact point calculation
is not the only way to place markers, as you pick data up to a fault,
contact points are placed automatically.
Calculating Contact Points
Follow these steps:
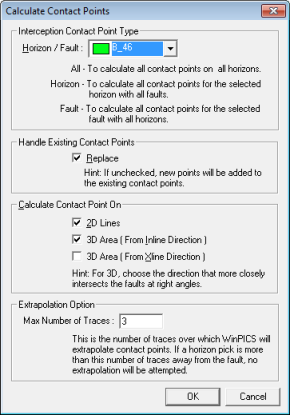
- Select a horizon under Horizon/Fault
to calculate all contact points for the selected horizon with all faults.
Select a fault under Horizon/Fault
to calculate contact points for the selected fault with all horizons.
To calculate all contact points on all horizons, select All
under Horizon/Fault.
- Select the check box to Replace existing contact points, or leave this box empty to keep existing
contact points while adding new points.
- Contact points are calculated for the active seismic line (2D line, 3D
in-line or cross-line). To display contact points on your map, select one of the following options:
- 2D Lines
- 3D Area (Inline)
- 3D Area (Xline)
- For contact points on 3D seismic, choose
the direction that more closely intersects the faults at right angles.
- If you want WinPICS to use extrapolation, type a value in the Max Number of Traces field. This is the number of traces over which WinPICS will extrapolate contact points. If a horizon pick
is more than this number of traces away from the fault, WinPICS will not attempt to extrapolate.
What do you want to do?
 View image
 How to open the calculate contact points dialog box