Open topic with navigation
Add/Edit Control Points
You may enter individual control points or a polyline of control points
to grid along with your data. Once you have entered a control point or
points you may change the mode to Make
Changes.
In Make Changes mode you can change the z value of an individual point
or all the points in a polyline. You can also manually edit the X and
Y coordinates or use sliders to reposition the control points.
Adding Control Points
- Right click on the map window and select from the popup menu. Alternatively, you can press <Ctrl>
+ <g> on your keyboard.
- In the dialog that opens, select the horizon,
and data type you wish to grid. Change the gridding filename if you like.
See Select Data to
Grid.
- Click <OK> to
open the Kernel Gridding dialog box.
- Click <Add/Edit
Control Points>.
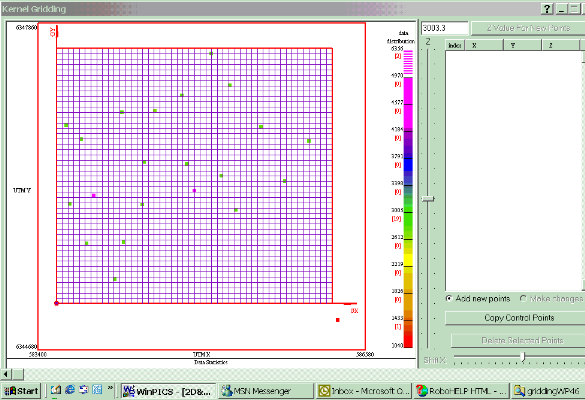
The Control Points dialog box will open. The Z
slider which runs along the right hand side of the map display can be
used to control the value of the control point you add. If you prefer,
you may type a value into the box at the top of the slider to set the
value of the control point.  View image

- Set the value for the first control point by typing
or using the slider.
- Left-click on the map to place a point. Continue
left clicking to add additional points to the polyline.
- Right-click to end the polyline.
- Left-click one and then right click to add one
point.
- Set the value for the next control point or points.
- Continue as above until you have entered all control
points.
- Click the <Make
Changes> button to edit control points. You can manually edit
X, Y, and/or Z. Optionally you can use sliders to relocate Control Points
or Control Point Polylines.
What do you want to do?
 View image
 View image