 View image
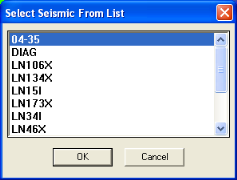
To open the Seismic window, you need to select seismic in the Map window. You can select a line directly from the map, or from a list.
Follow these steps:
 View image
| Icon | Hot-key | Description |
|---|---|---|

|
<l> | Select Any Line |

|
<2> | Select a 2D Line |

|
<i> + <x> | Select a 3D In-line or Xline |

|
<w> | Select a Well-spot or Well Synthetic |
| none | <L> | On the Map Menu bar, choose Select | From List to open the Select From List dialog box, where you can choose which seismic to view. |
 icon.
icon.
- To display the seismic line in an existing window, left-click the line and, without lifting the mouse button, drag it into the Seismic window. Release the mouse button.
- To display the seismic line in a new window, left-click the line. A new window will open.
- If your mouse is over more than one line, left-click, and then select one of the lines from the lines listed in the pop-up list.
Follow these steps:
 View image

What do you want to do?