Open topic with navigation
Surfer Export
To open the Surfer
Export dialog box, click  on the Result List tab toolbar, then
select Export Data | Export to Surfer.
Set the options to export your data to the third-party Surfer
application, where you can create contours from your data.

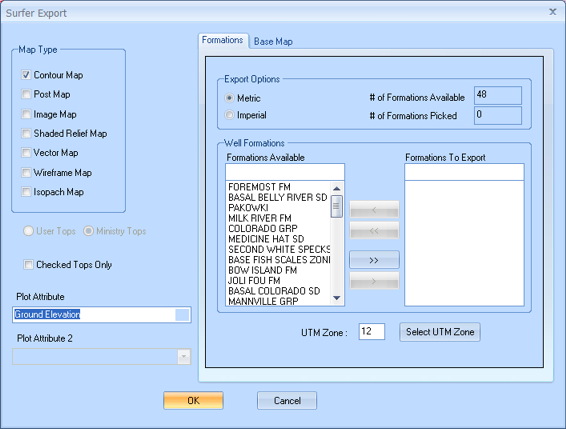
This dialog box has the following options:
- Map Type
- Select the map type you wish to export from, for example, Contour,
Post, Image, Shaded
Relief, Vector,
Wireframe
and .
- User Tops
- This option appears dimmed.
- Tops - This option appears dimmed.
- Checked Tops
Only - Select this box if you wish to export checked tops only.
If this isn't selected, you will export all tops in the ticket.
- Divestco Surfer will import one
top only. When you are exporting to Surfer and have Checked
Tops Only selected, GeoVista
uses the list setup on the Usertop Preference
dialog box to search the ticket's data until it finds a record with a
checked or verified top.
- Plot Attribute
- Select your first plot attribute from the list.
- Plot Attribute
2 - Select your second plot attribute from the list. This option
appears dimmed until you select Isopach
Map from the Map Type section.
This dialog box also has the following tabs:
 Formations
The following image shows the Formations
tab on the Surfer
Export dialog box:

This tab has the following options:
- Export Options
-
- Well Formations
-
- UTM Zone
-
- Select UTM Zone
-
- Base Map
What do you want to do?
![]() on the Result List tab toolbar, then
select Export Data | Export to Surfer.
Set the options to export your data to the third-party Surfer
application, where you can create contours from your data.
on the Result List tab toolbar, then
select Export Data | Export to Surfer.
Set the options to export your data to the third-party Surfer
application, where you can create contours from your data.
 Formations