To open the Layer Name Properties dialog box, right-click on a layer name in the Layer Manager tab and select Properties from the shortcut menu. Use this dialog box to edit a layer’s properties. Some of this dialog box's properties are only available for certain layer types.
| Section | When It's Available | Options |
|---|---|---|
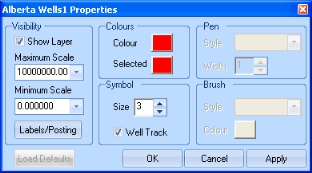
| Symbol | When you are setting properties for a layer with features represented by symbols (For example, a well layer or a facility layer). |
Size - Set the size of the symbol that will identify the feature. For example, you might choose a larger symbol to make a specific feature stand out on the map. Well Track - Select this check box if you want to display this layer's horizontal wells |
| Pen | When you are setting properties for a layer with features represented by lines (For example, a railway layer or a roads layer). | Style and Width - Set how you want the area drawn on the map. For example, if you want to see railway lines shown as thin dashed lines, select Style = Dash and Width = 1. |
| Brush | When you are setting properties for a layer with features represented as polygons (For example, a township or crown land) |
Style - Select from the list how you want the area to look on the map. For example, to stand out, you might want the township area to be filled in with vertical lines. Color - Click the <Colour> button (which displays the current fill color)to open the Color dialog box, where you can change the fill colour. For example, you might want all your crown lands to appear as purple sections in your map. |
What do you want to do?