Open topic with navigation
How to Post Labels for Alberta Crown Held Land
GeoVista enables you to post
labels on the Map
View that show your result lists' land ownerships, ownership percentages,
lease agreement numbers, sale dates, and lease expiration dates for held
lands. This feature makes it easy for you to overview hold lands and,
for example, to determine when hold land leases might soon expire in your
area of interest.
To post labels for hold lands, follow these steps:
- On the Map Tools toolbar, click
 to change your cursor to the zoom tool.
- Click and drag your cursor on the map to draw
a small square that represents the area you want to zoom in to. Release
your mouse to zoom to that area.
- If you zoom too small an area on your map, it is more likely that this
area will not have Alberta held crown land. The larger the area you zoom
to, the more likely it will have data.
- From the Main Menu bar, select Query | New Query to open the Create New Query
dialog box.
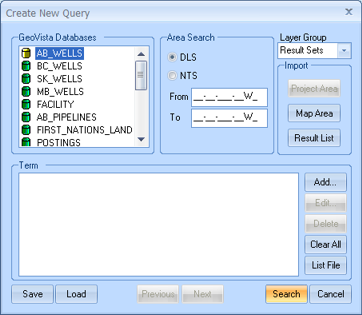
- In the GeoVista
Databases list, select a database for your query. Select AB_CROWN_LAND.
- In the Import
section, click <Map Area>
to import data from your zoomed area.
- Click <Search>
to generate your results list and open the Display
Result Set As dialog box.
- Click <OK>
to keep the GeoVista default
name for this result set. A new Result
Sets layer will display in the Layer
Manager tab.
- On the Layer Manager tab, expand the
Result Sets layer.
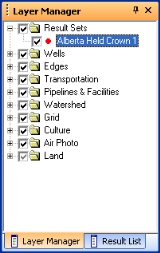
- Right-click the Alberta
Held Crown1 heading to open a shortcut menu.
- Select Properties
from this menu to open the <Layer Name> Properties
dialog box, where you can set label and posting properties for your freehold
land query.
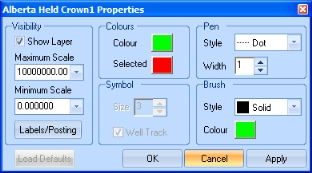
- GeoVista applies the name of
your result set to this dialog box. For example, if you selected freehold
land, rather than Alberta crown land, its name would be Freehold
Land Properties. Here, you see the name: Alberta
Held Crown1 Properties.
While you can set properties for either Expiry
date, Owner Name, Agreement number, or Sale
date, the next steps will only explain how to set posting properties
for the Expiry date for your result set.
- On the <Layer
Name> Properties dialog box, click <Labels/Posting>.
The Land
Posting dialog box opens.
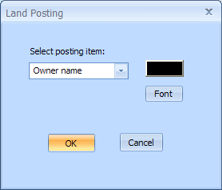
- In the Select
posting item list, select Expiry
date.
- Click <Font>
to open the Font
dialog box, where you can set your labels' font properties.
- In the Font Style
list, select Bold.
- Click the Color
rectangle, to open the Color
dialog box, where you can select a font color for your label.
- Select a new color for your labels. Select Yellow.
- Click <OK>
to return to the Land
Posting dialog box.
- Click <OK>
to return to the <Layer
Name> Properties dialog box.
- Click <Apply>
to see your label settings and selection on the Map View. Your labels now appear in yellow,
bold font.
What do you want to do?