Open topic with navigation
Text Property Tab
The Text Property
tab, found on the Time Slice Property Page
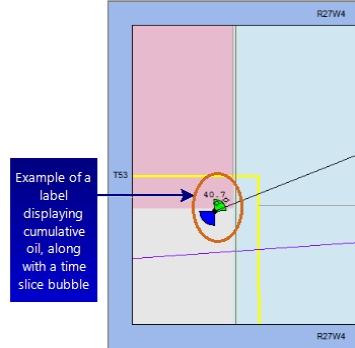
dialog box, provides options for you to add text labels to your time slice
results in the map. You can display up to four parameters to see how the quantity
changes over time.
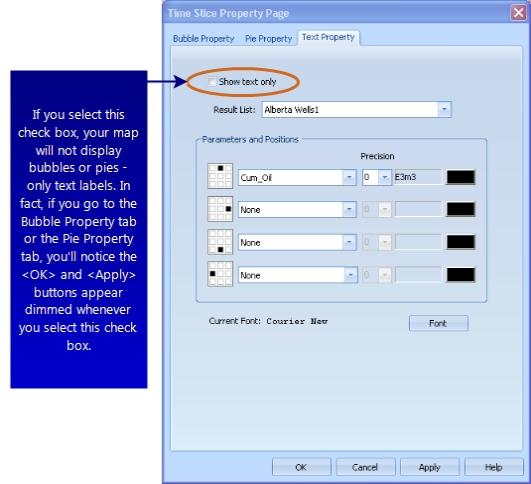
You'd select this option if you're interested in seeing the data only, and you do not want to
see the differences represented by either a time slice bubble or a pie.
Create time slice labels
- Select the Show
Text Only check box if you only want to display text labels in
your map; otherwise, clear this check box and you can set to display both
text labels and a bubble or a pie with each well.
- In the Results
List list, select for which result list to draw time slice labels.
- In the Parameters
and Positions box, select up to four labels to display with each
well. The graphic to the left of each list shows where in relation to
the well symbol the label will appear: either above, below, to the left,
or to the right. For example, in the first graphic, the little black box
appears in the top of the graphic
 , which signifies that
if you select a label parameter from this list, the label will appear
above the well symbol in the map.
, which signifies that
if you select a label parameter from this list, the label will appear
above the well symbol in the map.
- In the Precision
list beside each parameter, select the number of decimal places you want
to see for that label.
- Click <OK>
to draw your labels (and if you haven't selected the Show
Text Only check box, to also draw your bubbles or pies) and close
the dialog box, or click <Apply>
to draw your labels (and bubbles or pies if applicable) and keep the dialog
box open to continue to edit what's displayed.
Change the font and color for each label
By default each text label appears in the Courier
New font style and in the color black. However, you can decide
to change the font for all the labels and the color for each of the labels.
Follow these steps:
- Click the color box to the right of any parameter
list to open the Color
dialog box, and change the color of the font for that label type. Read
more about setting colors
- Try to set your time slice pies to
a color not already heavily used in the map. This will make smaller pies
easier to spot.
- Click <Font>,
located below the Parameters and Positions
box, to open the Font
dialog box, where you can select the font type, style, and size. The change
you make to the font applies to all the labels. You cannot modify the
font for individual time slice labels.
What do you want to do?