Open topic with navigation
Radial Line Navigation
You can open a fence, inline, or crossline, and then rotate that fence or line to step through seismic in a radius around the mid-point. Use radial line navigation when you want to look closely at the seismic around a well or a closure point on a 3D volume.
Follow these steps to rotate a fence or a line:
- Open a fence, or an inline or crossline on a 3D project.
- In the Seismic window, click
 on the Data Navigation toolbar, and select .
- In the Enter Radial Fence Step Angle in Degrees dialog box, type the value you want in degrees for each step in the rotation. By default, the rotation step is set to 30 degrees.
- Click <OK> to close the Enter Radial Fence Step Angle in Degrees dialog box.
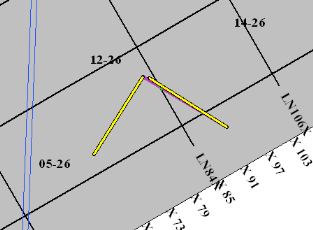
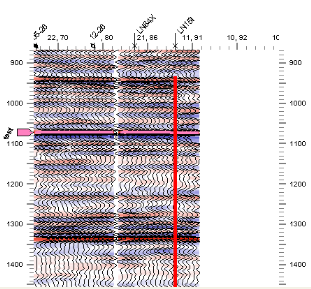
- Right-click on the seismic for the fence or line, and select , or . The Seismic view displays the seismic at the angle you set from the initial fence or line. The center point of the rotation is the middle of the fence or line. You can see the fence or line rotate simultaneously in the Map view, and in the Seismic view.
 View image


- You can also use keyboard shotcut keys to rotate through the steps. Press </> to rotate clockwise, and <\> to rotate counter-clockwise.
- Continue stepping through the seismic at the radial angle you set.
- When you rotate a fence or line, it may not look in the Map view as though it is rotating around a fixed point. This is because as the fence or line rotates, the number of traces before and after the pivot point may vary depending on how close the pivot point is to the edge of the 3D volume. Seismic always displays from the left side of the window, so it will look as though the center is moving. Furthermore, sometimes the bins in 3D projects are not square, which distorts the appearance of the rotation. However, if you look at the red vertical pivot point in the Seismic view, you can see that the pivot bin does not change.
- Press <Esc>on your keyboard to exit radial navigation mode.
What do you want to do?
 View image
 View image