Open topic with navigation
Create
a Fence in 3D Mode
Use 3D Mode  to
create fences composed of 3D in-lines and cross-lines. Follow these steps:
- Zoom
your map to the location where you want to create your fence.
- Click
 to turn on Fence
Mode (or press <f>
on your keyboard).
- Click
 |
|  to switch to All
Mode (or press <3>
on your keyboard).
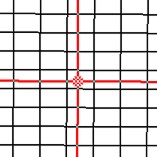
- Move your cursor over your 3D lines. At your cursor
location, WinPICS will display
red cross-hairs, parallel to the direction of the in-lines and cross-lines,
to help you select the desired 3D.
 View image

- If your area contains several sets of 3D whose lines overlap
each other, press <b> on
your keyboard to put one 3D survey in the background in order to select
traces from the other 3D survey.
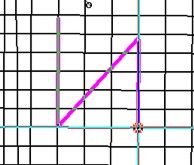
- Left-click on the map in the location where you
want to begin your fence, and then click in the location where you want
to end that fence segment. Continue clicking your mouse on the map to
add more segments to the fence. WinPICS
will highlight each completed segment as a bold magenta line.
 View image

- By default, WinPICS sets 3D mode
to enable you to select arbitrary lines, which means you can move your
mouse in any direction, including diagonally. However, if you want the
mouse to snap to the grid, meaning that you must follow the in-line and
cross-line directions, press your keyboard's <Shift>
key while you create your fence.
- If you click on the map to create a segment, and you decide you didn't
want to click in that location, click
 (or press your keyboard's
<Backspace> key) to delete
that fence point.
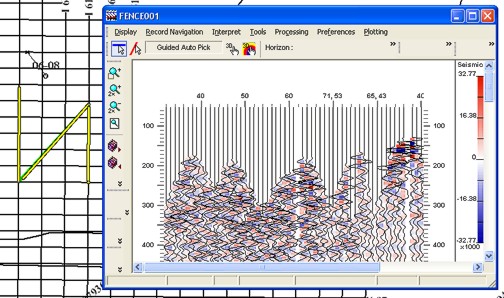
- Double-click the map to end your fence (alternatively,
you can select
 |
|  or press <D>
on your keyboard to end the fence). WinPICS
will highlight the selected lines in a bold yellow color, and it will
automatically open a Seismicwindow to display your fence.
  View image

- You can jump to 3D segments that are
not adjacent to one another, enabling you to join that 3D to your fence.
To add non-adjacent 3D, click
 (or press <f>
on your keyboard) to initiate a fence gap. WinPICS
will extend a dashed line that extends from the last fence segment, representing
the fence gap. Left-click the mouse at the location in the non-adjacent
3D where you want to begin the next segment of your fence.
- You
can also add segments from other data types (For example, synthetic wells
or 2D data). Read
more.
What do you want to do?
 to
create fences composed of 3D in-lines and cross-lines. Follow these steps:
 to
create fences composed of 3D in-lines and cross-lines. Follow these steps:
 to turn on Fence
Mode (or press <f>
on your keyboard).
 |
|  to switch to All
Mode (or press <3>
on your keyboard).
 View image
 View image
 |
|  or press <D>
on your keyboard to end the fence). WinPICS
 View image