Open topic with navigation
Create a Query
Create a query to build result lists based on specific search criteria.
You can then work with those result lists in GeoVista. Follow these steps to create a query:
- From the Map Tools toolbar, select
 .
.
- On the Map View, draw a tiny rectangle on the
province of Alberta to zoom in to that area on the map.
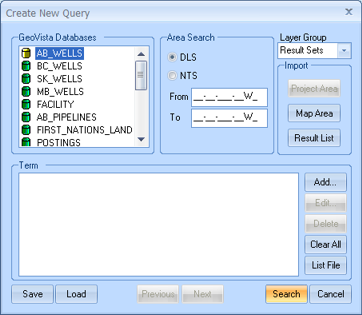
- Select Query
| New Query to open the Create New Query dialog
box.
- To make sure you
do not miss any steps when you create your query, move around the Create New Query
dialog box in a clockwise pattern.
- Select a database from the GeoVista
Database list. For example, select AB_Wells.
- Set your search area. You can enter
or coordinates, set the search
to the currently displayed area in your map, search only the results in
a current result set, or leave blank to search the entire database.
- Click <Map
Area> to use the area you've zoomed in to.
- Click <Add>
to open the Term
Builder dialog box, where you can specify what fields to search.
- You can also double-click
the database name to open the Term
Builder dialog box
- Click <Add>
on the Term Builder
dialog box to add your search string to the Create
New Query dialog box. When you finish adding your search strings,
click <Close>. Your query
strings display in the Term
window.

- Modify
the SQL string in the Term
window, if necessary.
- From the Layer
Group list, select in which folder on the Layer Manager tab you want to
store your results.
- Click <Search>
to generate the query.
- When the Display
Result Set As dialog box opens, type a descriptive name for your
new query.
- The query name should
help describe the query results.
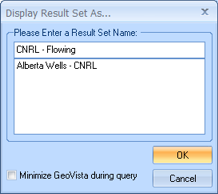
- Click <OK>.
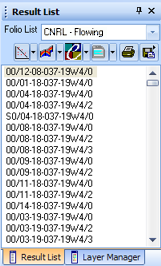
GeoVista will run your query
and display the results on the Object
Manager bar's Result List tab.
- If your query does not display any results, in other words, if what you
are searching for is not found in the area you specified, GeoVista
will display a warning message.
If you want to save your results list separately for future use:
- Right-click on any item in the list and select
Save Ticket As... from the list.
The Export/Save Options
dialog box displays.
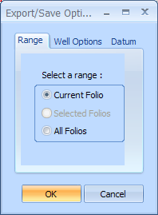
- On the Export
Save Options dialog box, select the All
Folios option to save all items in the list. A Save
As dialog box displays.
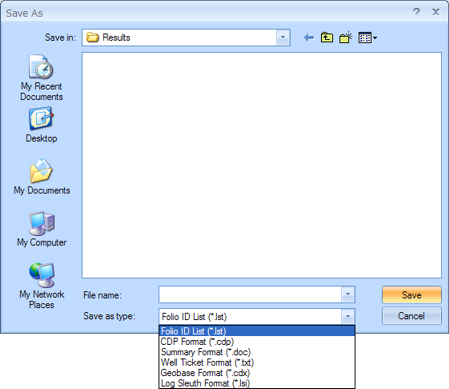
- From the Save
as type list box, select Folio
ID List (*.lst).
- In the File name
box, enter a name for your file. For example, type CNRL
- Flowing.
- Click <Save>
to save the list in the Results
folder of the GeoVista install
folder.
- The saved list (.lst file) contains only the primary
key information for the queried database and nothing more. The list
is used for faster searches when combined with other lists or query parameters.
Well ticket information is not contained in the list file and only will
display after the list is used in a future query.
List File Query
To use your list file in a query, open the Create
New Query dialog box and select a database to search. Enter your
search criteria. Combine this query with a result list by clicking <List File> and selecting your saved
list file.
- A result list file must exist to utilize this aspect of GeoVista and you need to select
the database before you select
your list file.
You can combine a number of result lists for your queries in the same
way you would combine other search criteria.
- List file queries contain primary key information
only.
What do you want to do?